


Building a rudimentary battery backup for your USB powered devices (IoT, Raspberry, etc)
Posted by jpluimers on 2020/07/14
Malcolm Lewis [WayBack] came with these interesting pastes for a rudimentary battery backup servicing USB powered devices:
Since both expired, here is some more elaboration with Amazon.com links:
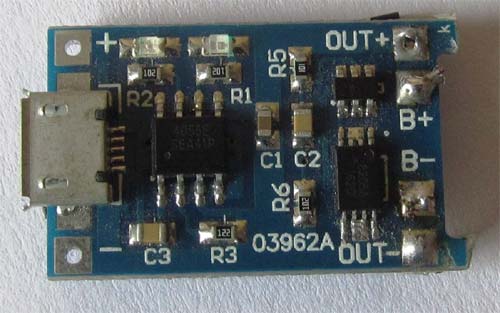
- 1 off Icstation TP4056 Micro USB 5V 1A 18650 Lithium Battery Charger Board with Over Charge Discharge Protection
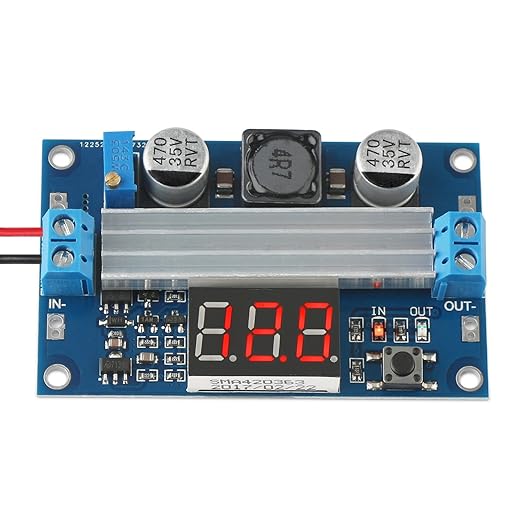
- 1 off Icstation 2577 Mico USB DC Voltage Regulator Step Up Boost Converter Power Supply Module 2V-24V to 5V-28V 2A
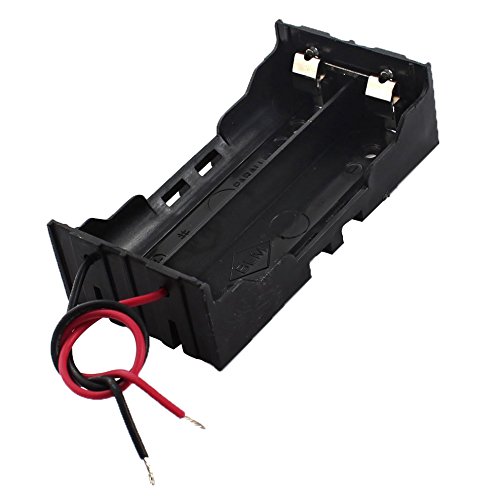
- 1 off TOOGOO (R) 2 piece battery storage box case holder for 2 x 18650 parallel lithium batteries
- 2 off 18650 3.7V 9800mAh Yellow Li-ion Rechargeable Battery
From the picture linked above (full one at the bottom of the post): a switch is missing from the parts list (:
Note that this is only the hardware parts, and no measurements of the voltage from the Raspberry Pi. So it is a battery backup, not a UPS.
For a UPS kind of functionality, you need more hardware (measure voltage to assess when to safely shut down, reset circuitry for when power comes up), and software (so the devices can shutdown).
Connections
 After IRC chatting with Lewis (see his [WayBack] profile), this is how they should be connected:
- USB charger:
- OUT connector type A of USB charger cable
- Connections to the TP4056 battery charger (a nice video on this is at Charging a Lithium 18650 Cell using the TP4056)
- IN mini/micro USB from connector type B of USB charger cable
- BAT pins B+ and B- to the + and – of the 18650 battery holder
 OUT pins +/- to your LM2577 IN pins+/-
- 18650 battery holder
- IN pins +/- to the TP4056 BAT pins +/-
- One or two 18650 batteries
- Note
- Most of the wired “parallel” 18650 dual battery holders on non-USA Amazon sites are in fact serial (you see that in the comments, or by watching the wiring carefully), so better buy an unwired one!
 Connections to the adjustable LM2577 step-up converter having a max current of 3A
(get one *with* voltage meter, as voltage meteres themselves are about half the price of the LM2577!)- IN pins from the TP4056 OUT pins
- Adjust to slightly above 5V before connecting anything else!
- For a Raspberry Pi, 5.1V will do as that is used by the official [WayBack] Power Supply – Raspberry Pi Documentation; though full voltage range is not fully clear from the [WayBack] Raspberry Pi Power FAQs, however:
- 4.75..5.25V range from [WayBack] Acceptable input voltages for power? – Raspberry Pi Forums
- 4.45..5.25V range from USB Power specifications (which indicate 5.00[+0.25..−0.60]V by USB 2.0, and 5.00[+0.25..−0.55]V by USB 3.0)
- For a Raspberry Pi, 5.1V will do as that is used by the official [WayBack] Power Supply – Raspberry Pi Documentation; though full voltage range is not fully clear from the [WayBack] Raspberry Pi Power FAQs, however:
- OUT pins +/- to the red/black pins of a connector A stripped micro USB cable
- USB powered device (like Raspberry Pi)
- Micro USB connector: connector B of the USB cable coming out of LM2577

 If you want to measure both voltage and current, then a combined piece like Voltmeter Amperemeter Dual Digital Volt Amp Meter Messgerät 100V 10A is very convenient. Most of these do not come with schematics, so here is one:
Specs
- LM2577 max current 3A: [WayBack] components – Question on LM2577 – Electrical Engineering Stack Exchange
Parts from Amazon.de
- [Archive.is] IZOKEE 5 Stück 1A 5V Micro USB 18650 TP4056: AmazonSmile: Elektronik
- 18650 holders
- [Archive.is] TOOGOO(R) LM2577 DC-DC einstellbar Step up Stromversorgungsmodul mit 3 stelliger Anzeige: AmazonSmile: Baumarkt
- [Archive.is] Raspberry Offizielles Pi 3 Netzteil schwarz – 2,5A/5V: AmazonSmile: Computer & Zubehör
- [Archive.is] Micro USB Kabel, Gritin 3 Pack Nylon USB cable: AmazonSmile: Elektronik
- [Archive.is] Voltmeter Amperemeter Dual Digital Volt Amp Meter Messgerät 100V 10A: AmazonSmile: Beleuchtung

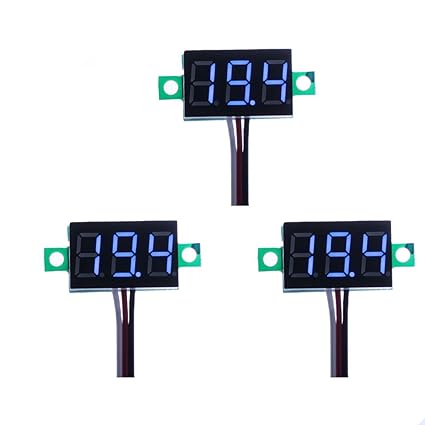
- [Archive.is] ELENKER 3 Stück Mini Digital Voltmeter Blau LED Panelmeter 3 Kabel, Messbereich DC 0-100V, Eingang DC 5V-30V: AmazonSmile: Baumarkt
Media
- TP5056 image from [WayBack] TP4056A Li-ion Battery Charging/Discharging Module Pinout, Uses & Datasheet
- LM2577 image from [WayBack] RioRand LM2577 DC-DC Adjustable Step Up Converter 3-34V to 4-35V 5V/12V Voltage Regulator+LED Voltmeter – Electronics
- 18650 battery+holder from [WayBack] OEM Dual 18650 Battery Holder 3.7v 18650 Battery Pack Holder Box Mod Battery Holder Parallel Connection OEM Battery Pack 3.7v DIY Box Mod Battery Keystone Holder Online with $1.63/Piece on Supervalue’s Store | DHgate.com
- Voltage/Current meter schematics: Source: Wayback Machine
There is a 6A module; though I’m not sure it is based on LM2577
- [WayBack] Amazon.com: DROK DC-DC Boost Voltage Converter, 6A 100W Step Up Regulator Module DC 3-35V to DC 3.5V-35V Adjustable Low Volt Power Supply Transformer Controller Board with LED Display: Home Improvement
Bad battery box example
–jeroen


Leave a comment