Archive for the ‘Office 2010’ Category
Posted by jpluimers on 2024/02/14
Calculating an ISO-8601 based WEEKNUM
From [Wayback/Archive] ISOWEEKNUM Function – How to Get the Week Number in Excel:
- If we are using an older version of MS Excel, we can use the function
WEEKNUM. By default, the WEEKNUM function uses an arrangement where Week 1 begins on January 1, and Week 2 begins on the next Sunday (when the return_type argument is omitted, or supplied as 1).
However, with MS Excel 2010 for Windows and MS Excel 2011 for Mac, we can generate an ISO week number using 21 as the return_type: =WEEKNUM(date,21).
- There is no built-in worksheet function for ISO weeks before MS Excel 2010.
I tested that ISO-8601 week number calculation in with Excel 2011 on MacOS and Excel 2010 on Windows: the workaround works well for the dates mentioned in ISO week date – Wikipedia.
Read the rest of this entry »
Posted in Excel, Office, Office 2010, Office 2011 for Mac, Power User | Leave a Comment »
Posted by jpluimers on 2022/03/01
Sometimes, you figure out Excel functionality you have never needed before, but has been there for decades.
A while ago, I had a very complex with formulas referencing full columns back and forth when suddenly I got into something strange: when reloading the spreadsheet, values would not appear because of recursion errors. Before saving this was fine, so it was hard to track back where I want wrong.
So I was happy to find out that Excel has two cool features for this:
- Trace Precedents
- Trace Dependents
Heck, looking at the icons I had a feel these features had been there for a long time. Boy, was I surprised to find them in [Wayback] Excel 2000 – Student Edition – Complete (a great book by the way), as you can see in this picture:
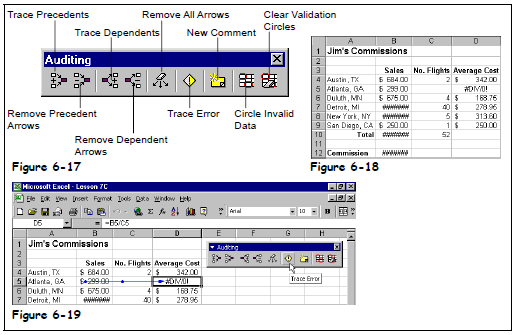
Excel 2000 – Student Edition – Complete – Trace precedents, dependents, error
As others can explain this feature so much better than I can, here are some links:
–jeroen
Posted in Excel, Office, Office 2000, Office 2003, Office 2007, Office 2010, Office 2011 for Mac, Office 2013, Office 2016, Power User | Leave a Comment »
Posted by jpluimers on 2021/10/01
Every now and then, for instance with a document including other documents, like in a homework assignment, you might want to exclude part of your Heading 1 (or Heading 2/Heading 3) entries from the table of contents.
Since presence in the Table of Contents is a ToC feature, not a style feature, you have to set the correct options in the ToC.
This is how you do it:
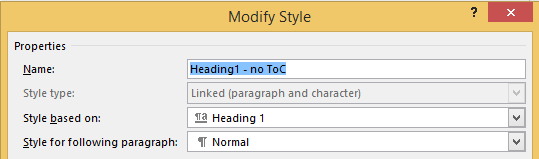
- Create new styles for the headings you do not want in the ToC (I call them “Heading 1, no ToC”; “Heading 2, no ToC”; etcetera) and base each on the corresponding style “Heading 1” or “Heading 2”
- Modify your Table of Contents to exclude these new styles (as they are automatically included)
This is contrary to many advices to use the “Reference” toolbar, then “Add Text” marked “Do Not Show In Table Of Contents”. That advice will remove the heading formatting completely and remove it from the navigation pane, so do not follow [WayBack] Quick Tip: How to exclude headings from the Table of Contents in Microsoft Word – jeffreykusters.nl.
The above solution both keeps the formatting, and the appearance in the navigation pane. It only disappears from the Table of Contents.
It is based on:
Following the above steps, you get styles like this:
Read the rest of this entry »
Posted in Office, Office 2010, Office 2011 for Mac, Office 2013, Office 2016, Power User, Word | Leave a Comment »
Posted by jpluimers on 2021/07/23
On an old system, I found some x86 installers with names like RbudLR.cab, RosebudMUI.msi, RosebudMUI.xml, setup.xml.
They appeared to be the (now deprecated and never released as x64): MSDAIPP – Wikipedia (Microsoft Data Access Internet Publishing Provider).
Searching for RosebudMUI many returned detection scams like solvusoft, but somewhere further down was this only meaningful result: [WayBack] What is the RosebudMUI AddOn in Visio 2007?
–jeroen
Posted in Office, Office 2010, Power User, Windows | Leave a Comment »
Posted by jpluimers on 2021/06/11
Steps to have only the body parts of your Winword document Heading 1 numbered, but parts like Summary and Table of Contents without numbering.
Related:
Steps:
- Create a document with
- some paragraphs of body text, intertwined with:
- some paragraphs that should become numbered headings,
- some paragraphs that should become non-numbered headings
- room for a table of context
- Go to the “Styles” popup (keyboard shortcut
Ctrl+Shift+Alt+S, or ribbon “Home” -> section “Styles” -> small button on the lower right of the ribbon section
- For each paragraph that should become a heading, apply style “Heading 1” (you can also use keyboard shortcut
Ctrl+Alt+1 for this)
- Modify the various heading levels so they become numbered: see [WayBack] How to create numbered headings or outline numbering in Word 2007 and Word 2010 | ShaunaKelly.com. I prefer the hierarchical numbered multilevel list without the numbers being indented for the body text, but with indented numbers in the Table of Contents, so lets go.
- Start with the stock multi-leveled list definition:
- Change from “None”
 to the multi-level one:
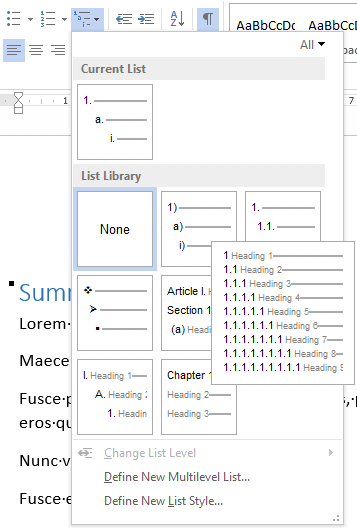
- Now create a new one based on it:
- “Define New List Style…”:

- Rename from “Style1”
 to “Heading
- This involves creating a new list style called “Headings”, based on the numbered list style you like
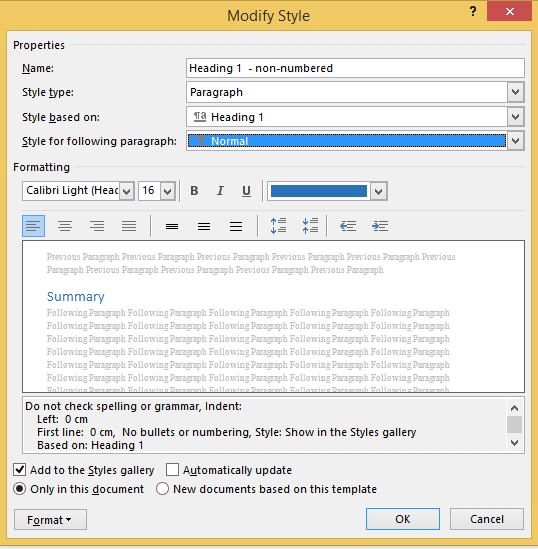
- Since by default, these bind to all levels, your document styles “Heading 1”..”Heading 9″ are covered. If for one or more styles, you do not want numbering, see below how to fix that (I do that for a “Heading 1 – no-numbering” style used for the “Summary” heading, and for the “TOC Heading” style.
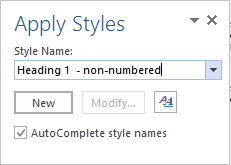
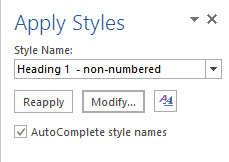
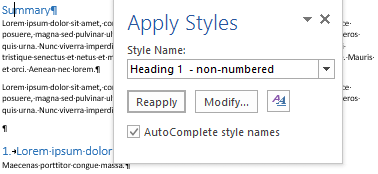
- Mark the “Summary” heading as a new style “Heading 1 – non-numbered”:
- Press
Ctrl+Shift+S to get to the “Apply Styles” 
- Enter the new name “Heading 1 – non-numbered” and press the “New” button:
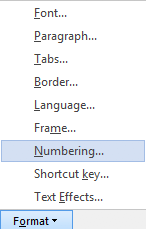
- Press the “Modify” button
- to view the current style

- Press “Format” ->
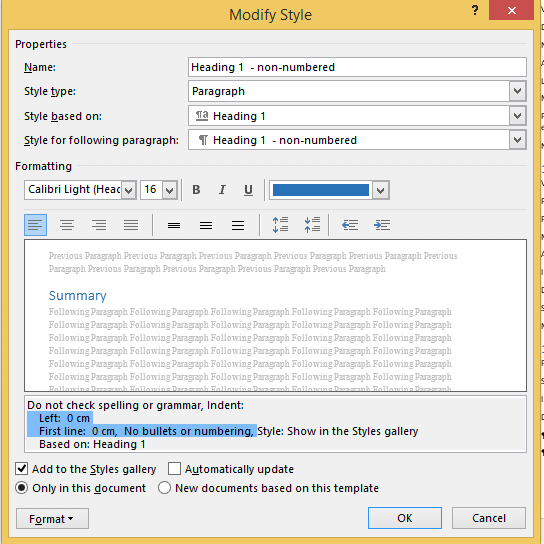
- Change it from “None”
 to “None” and press “OK”
- Observe the numbering is gone:
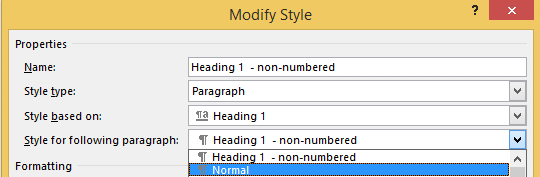
- Unlike the “Heading 1” style, the “Style for following paragraphs” is wrong: it needs to be
- Now we are done, so press the “OK” button:
- Then observe the first numbered “Heading 1” now has got the number “1” instead of the “Summary”:
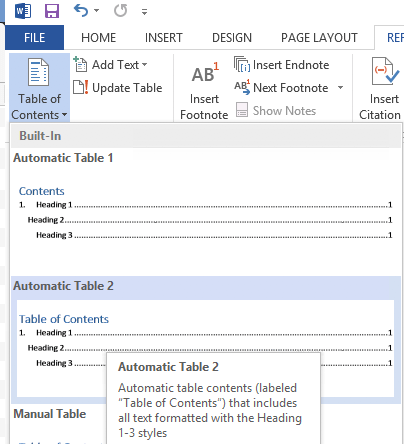
- Insert a “Table of Contents”, for instance after the “Summary”
- You might think it will start with a heading “Table of Contents”:
- Im some localisations of office, it is prepended with a “1.” and becomes “1. Table of Contents”. If it does, then you have to change style “TOC Heading” and undo the numbering as done with “Heading 1 – non-numbering” by pressing
Ctrl+Shift+S when you are in the “Table of Contents” heading: 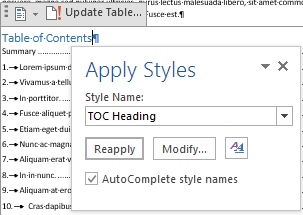
- From there, press the “Modify” button and continue as done with “Heading 1 – non-numbering”:
–jeroen
Posted in Office, Office 2007, Office 2010, Office 2013, Office 2016, Power User, Word | Leave a Comment »
Posted by jpluimers on 2021/06/07
Choices:
=lorem(...): Ramdom Lorem Ipsum text paragraphs.
- The sentences are roughly between 0.25 and 1.0 document widths in length.
=rand(...): Random English help text like paragraphs.
- The sentences are roughly between 0.5 and 1.5 document width in length.
=rand.old(...): “The quick brown fox jumps over the lazy dog.” paragraphs (up until Word 2003, this was what rand(...) returned).
- The sentences are always the same length.
(...) parameters:
(x,y): x paragraphs of y sentences of text(y): y paragraphs of 3 sentences of text (lorem more towards 1, rand more towards 3)(): depends on the function:
=lorem(): 5 paragraphs of 3 sentences of text=rand(): 5 paragraphs of 3 sentences of text=rand.old(): 3 paragraphs of 3 sentences of text
Note:
- There is no way to specify x paragraphs of random number lines of text.
- They need to have “Replace text as you type” enabled (see menu option “File” -> “Options” -> “Proofing” -> “Autocorrect Options”)
- Word 2003 and lower only have
=rand(...)
Based on:
Related: [WayBack] 10 awesome Lorem Ipsum alternatives – Justinmind via [WayBack] rand () in word – Microsoft Tech Community – 325554
For a random document demo, I usually do this:
=lorem(100,1) to get 100 paragraphs of 1 line of text- About every 10 paragraphs, I mark a paragraph with a relevant Heading style
- Inside the remaining text, I combine some paragraphs to get longer ones
–jeroen
Posted in Office, Office 2003, Office 2007, Office 2010, Office 2013, Office 2016, Power User, Word | Leave a Comment »
Posted by jpluimers on 2019/11/18
Not sure how long these will stay valid, but apparently my nl_office_professional_plus_2010_with_sp1_x86_x64_dvd_731121.iso was damaged (I forgot to check the hash) but I could download a fresh one from [WayBack] Download Earlier Versions of Office.
If you cannot find it by product key (I also tried it with a Visio one: worked fine too), then you can use [WayBack] Office 2010 direct link, X16-32250.exe, X16-32213.exe which are archived here:
–jeroen
via: [WayBack] Lost Office 2010 or 2013 CD/DVD? Legally Download Office From Microsoft
Posted in Office, Office 2010, Power User | Leave a Comment »
Posted by jpluimers on 2018/10/29
For my link archive: [WayBack] Language Accessory Pack for Office – Office Support (short-link)
All supported languages for Office 2010, 2013 and 2066/newer versions.
–jeroen
Posted in Office, Office 2010, Office 2013, Office 2016, Power User, Windows | Leave a Comment »
Posted by jpluimers on 2017/05/05
I don’t need Skype (aka Lync) on all my VMs, for enough reasons (obnoxiously getting in the way even when not configured, downloading updates even though not used, taking up space, etc).
Removing it through appwiz.cpl is more than just a single step. The reason is that Skype can be part of Office and – despite the updates being called Skype – can be listed as the Lync component in Office.
So the removal is as follows:
- Run appwiz.cpl
- Select the Microsoft Office version you have installed
- Right click, then choose Change
- Choose “Add or Remove features” then “Continue”
- Choose the dropdown left of “Microsoft Lync” or “Microsoft Office”, then click “Not Available” and click “Continue”
- Wait for the removal to proceed, then click “Close”
–jeroen
via: Solved: Completely Uninstall Skype For Business – Skype Community
Posted in Office, Office 2010, Office 2013, Office 2016, Power User | Leave a Comment »