Archive for the ‘Office 2016’ Category
Posted by jpluimers on 2022/03/01
Sometimes, you figure out Excel functionality you have never needed before, but has been there for decades.
A while ago, I had a very complex with formulas referencing full columns back and forth when suddenly I got into something strange: when reloading the spreadsheet, values would not appear because of recursion errors. Before saving this was fine, so it was hard to track back where I want wrong.
So I was happy to find out that Excel has two cool features for this:
- Trace Precedents
- Trace Dependents
Heck, looking at the icons I had a feel these features had been there for a long time. Boy, was I surprised to find them in [Wayback] Excel 2000 – Student Edition – Complete (a great book by the way), as you can see in this picture:
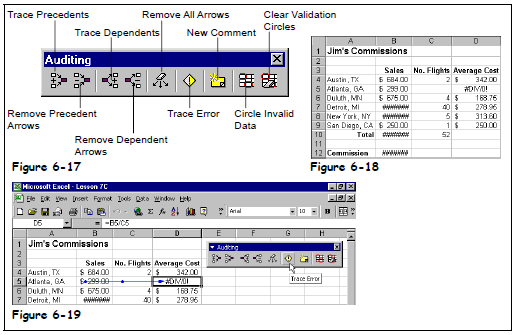
Excel 2000 – Student Edition – Complete – Trace precedents, dependents, error
As others can explain this feature so much better than I can, here are some links:
–jeroen
Posted in Excel, Office, Office 2000, Office 2003, Office 2007, Office 2010, Office 2011 for Mac, Office 2013, Office 2016, Power User | Leave a Comment »
Posted by jpluimers on 2021/10/01
Every now and then, for instance with a document including other documents, like in a homework assignment, you might want to exclude part of your Heading 1 (or Heading 2/Heading 3) entries from the table of contents.
Since presence in the Table of Contents is a ToC feature, not a style feature, you have to set the correct options in the ToC.
This is how you do it:
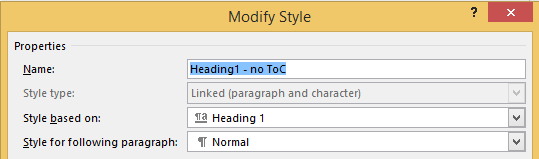
- Create new styles for the headings you do not want in the ToC (I call them “Heading 1, no ToC”; “Heading 2, no ToC”; etcetera) and base each on the corresponding style “Heading 1” or “Heading 2”
- Modify your Table of Contents to exclude these new styles (as they are automatically included)
This is contrary to many advices to use the “Reference” toolbar, then “Add Text” marked “Do Not Show In Table Of Contents”. That advice will remove the heading formatting completely and remove it from the navigation pane, so do not follow [WayBack] Quick Tip: How to exclude headings from the Table of Contents in Microsoft Word – jeffreykusters.nl.
The above solution both keeps the formatting, and the appearance in the navigation pane. It only disappears from the Table of Contents.
It is based on:
Following the above steps, you get styles like this:
Read the rest of this entry »
Posted in Office, Office 2010, Office 2011 for Mac, Office 2013, Office 2016, Power User, Word | Leave a Comment »
Posted by jpluimers on 2021/06/11
Steps to have only the body parts of your Winword document Heading 1 numbered, but parts like Summary and Table of Contents without numbering.
Related:
Steps:
- Create a document with
- some paragraphs of body text, intertwined with:
- some paragraphs that should become numbered headings,
- some paragraphs that should become non-numbered headings
- room for a table of context
- Go to the “Styles” popup (keyboard shortcut
Ctrl+Shift+Alt+S, or ribbon “Home” -> section “Styles” -> small button on the lower right of the ribbon section
- For each paragraph that should become a heading, apply style “Heading 1” (you can also use keyboard shortcut
Ctrl+Alt+1 for this)
- Modify the various heading levels so they become numbered: see [WayBack] How to create numbered headings or outline numbering in Word 2007 and Word 2010 | ShaunaKelly.com. I prefer the hierarchical numbered multilevel list without the numbers being indented for the body text, but with indented numbers in the Table of Contents, so lets go.
- Start with the stock multi-leveled list definition:
- Change from “None”
 to the multi-level one:
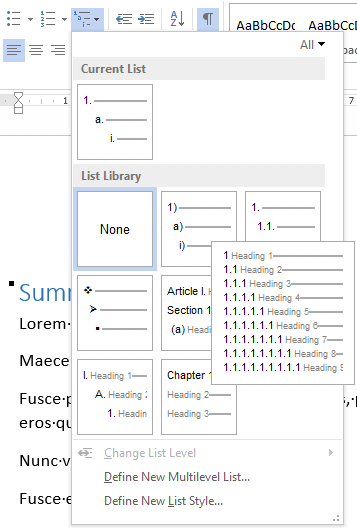
- Now create a new one based on it:
- “Define New List Style…”:

- Rename from “Style1”
 to “Heading
- This involves creating a new list style called “Headings”, based on the numbered list style you like
- Since by default, these bind to all levels, your document styles “Heading 1”..”Heading 9″ are covered. If for one or more styles, you do not want numbering, see below how to fix that (I do that for a “Heading 1 – no-numbering” style used for the “Summary” heading, and for the “TOC Heading” style.
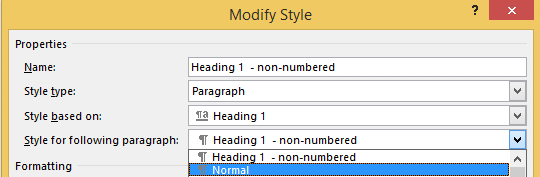
- Mark the “Summary” heading as a new style “Heading 1 – non-numbered”:
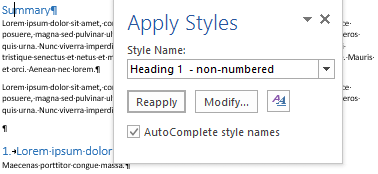
- Press
Ctrl+Shift+S to get to the “Apply Styles” 
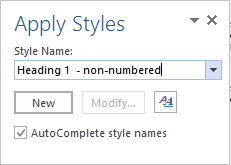
- Enter the new name “Heading 1 – non-numbered” and press the “New” button:
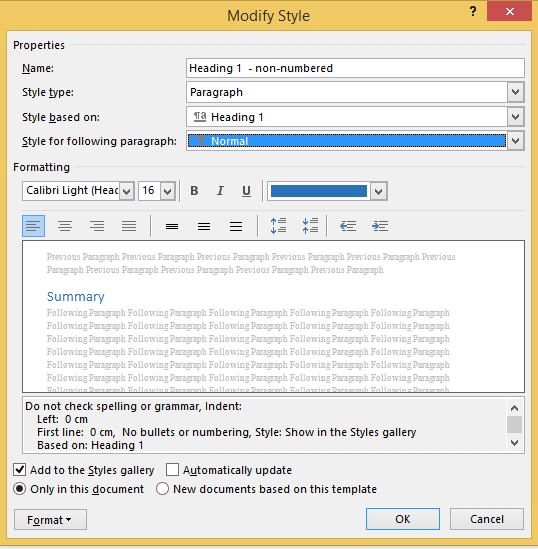
- Press the “Modify” button
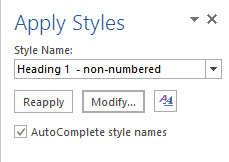
- to view the current style

- Press “Format” ->
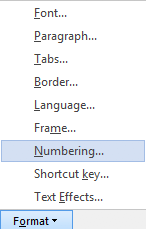
- Change it from “None”
 to “None” and press “OK”
- Observe the numbering is gone:
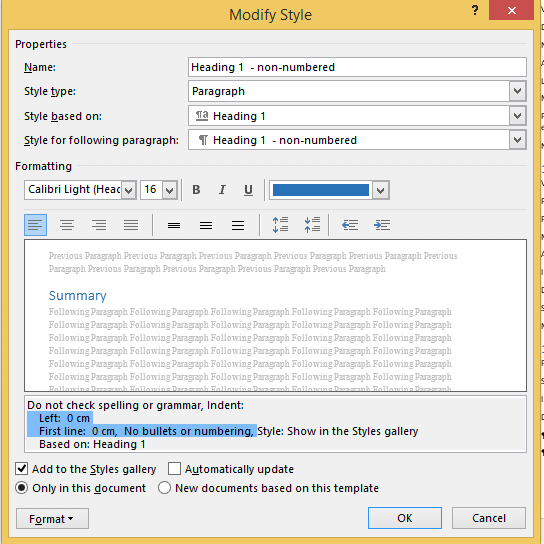
- Unlike the “Heading 1” style, the “Style for following paragraphs” is wrong: it needs to be
- Now we are done, so press the “OK” button:
- Then observe the first numbered “Heading 1” now has got the number “1” instead of the “Summary”:
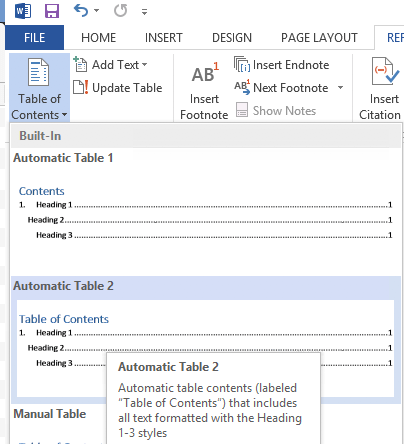
- Insert a “Table of Contents”, for instance after the “Summary”
- You might think it will start with a heading “Table of Contents”:
- Im some localisations of office, it is prepended with a “1.” and becomes “1. Table of Contents”. If it does, then you have to change style “TOC Heading” and undo the numbering as done with “Heading 1 – non-numbering” by pressing
Ctrl+Shift+S when you are in the “Table of Contents” heading: 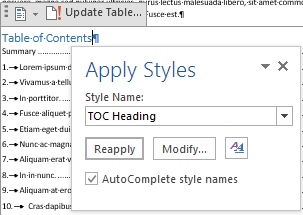
- From there, press the “Modify” button and continue as done with “Heading 1 – non-numbering”:
–jeroen
Posted in Office, Office 2007, Office 2010, Office 2013, Office 2016, Power User, Word | Leave a Comment »
Posted by jpluimers on 2021/06/07
Choices:
=lorem(...): Ramdom Lorem Ipsum text paragraphs.
- The sentences are roughly between 0.25 and 1.0 document widths in length.
=rand(...): Random English help text like paragraphs.
- The sentences are roughly between 0.5 and 1.5 document width in length.
=rand.old(...): “The quick brown fox jumps over the lazy dog.” paragraphs (up until Word 2003, this was what rand(...) returned).
- The sentences are always the same length.
(...) parameters:
(x,y): x paragraphs of y sentences of text(y): y paragraphs of 3 sentences of text (lorem more towards 1, rand more towards 3)(): depends on the function:
=lorem(): 5 paragraphs of 3 sentences of text=rand(): 5 paragraphs of 3 sentences of text=rand.old(): 3 paragraphs of 3 sentences of text
Note:
- There is no way to specify x paragraphs of random number lines of text.
- They need to have “Replace text as you type” enabled (see menu option “File” -> “Options” -> “Proofing” -> “Autocorrect Options”)
- Word 2003 and lower only have
=rand(...)
Based on:
Related: [WayBack] 10 awesome Lorem Ipsum alternatives – Justinmind via [WayBack] rand () in word – Microsoft Tech Community – 325554
For a random document demo, I usually do this:
=lorem(100,1) to get 100 paragraphs of 1 line of text- About every 10 paragraphs, I mark a paragraph with a relevant Heading style
- Inside the remaining text, I combine some paragraphs to get longer ones
–jeroen
Posted in Office, Office 2003, Office 2007, Office 2010, Office 2013, Office 2016, Power User, Word | Leave a Comment »
Posted by jpluimers on 2020/03/31
As I need this one day:
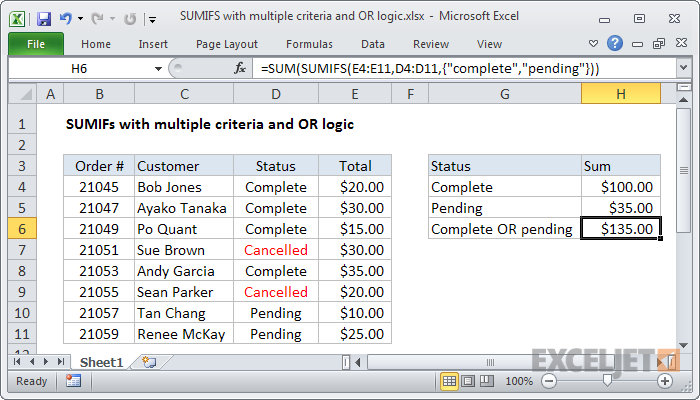
To sum based on multiple criteria using OR logic, you can use the SUMIFS function with an array constant. In the example shown, the formula in H6 is:
=SUM(SUMIFS(E4:E11,D4:D11,{"complete","pending"}))
Source: [WayBack] Excel formula: SUMIFS with multiple criteria and OR logic | Exceljet
–jeroen
Posted in Development, Excel, Office, Office 2011 for Mac, Office 2013, Office 2016, Power User, Software Development | Leave a Comment »
Posted by jpluimers on 2018/11/05
Both in %TEMP% and %Windir%\TEMP, a lot of log files named %COMPUTERNAME%-yyymmdd-hhnn.loghaving entries named Click-To-Run General Telemetry appear.
Anyone who knows how to disable this logging?
I think they are related to Office 2016 installed through Office 365.
Disabling the Click-To-Run Monitor scheduled task is not a good solution, as it will also Office disable update notification: [WayBack] MS Office 2016 – Click to run logs | MalwareTips Forums
–jeroen
Posted in Office, Office 2016, Power User, Windows | Leave a Comment »
Posted by jpluimers on 2018/10/29
For my link archive: [WayBack] Language Accessory Pack for Office – Office Support (short-link)
All supported languages for Office 2010, 2013 and 2066/newer versions.
–jeroen
Posted in Office, Office 2010, Office 2013, Office 2016, Power User, Windows | Leave a Comment »
Posted by jpluimers on 2018/09/11
After each reboot on the admin console after every logon and after every RDP connection:
net stop ClickToRunSvc
Via [WayBack] Office 365 #fail: Not sure yet, but every now and then – without any UI showing – C:\Program Files\Common Files\Microsoft Shared\ClickToRun\OfficeClickT… – Jeroen Wiert Pluimers – Google+
Office 365 #fail: Not sure yet, but every now and then – without any UI showing – C:\Program Files\Common Files\Microsoft Shared\ClickToRun\OfficeClickToRun.exe is using truckloads of CPU while executing an invisible OneDriveSetup.exe both totaling 100% of the full CPU for tens of minutes.
Since it needs to run after each RDP connection, Windows: running a batch file during logon of a single or all users is not enough.
I will need to dig into [WayBack] remote desktop – Run application or script on Windows RDC connection – Super User and [WayBack] SessionChangeDescription Struct (System.ServiceProcess) | Microsoft Docs
–jeroen
Posted in Office, Office 2016, Power User | Leave a Comment »
Posted by jpluimers on 2018/05/11
If you use Outlook to check and manage your email, you can easily use it to check your Gmail account as well. You can set up your Gmail account to allow you to synchronize email across multiple machines using email clients instead of a browser.
Oh: you need to lower your Gmail security for Outlook 2013 as the latter isn’t up to par on security. For that, follow similar steps like in “the user name or password for imap.gmail is incorrect” – iPad, iPod or iPhone with iOS < 7.
–jeroen
Posted in GMail, Google, Office, Office 2013, Office 2016, Outlook, Power User | Leave a Comment »
Posted by jpluimers on 2017/05/05
I don’t need Skype (aka Lync) on all my VMs, for enough reasons (obnoxiously getting in the way even when not configured, downloading updates even though not used, taking up space, etc).
Removing it through appwiz.cpl is more than just a single step. The reason is that Skype can be part of Office and – despite the updates being called Skype – can be listed as the Lync component in Office.
So the removal is as follows:
- Run appwiz.cpl
- Select the Microsoft Office version you have installed
- Right click, then choose Change
- Choose “Add or Remove features” then “Continue”
- Choose the dropdown left of “Microsoft Lync” or “Microsoft Office”, then click “Not Available” and click “Continue”
- Wait for the removal to proceed, then click “Close”
–jeroen
via: Solved: Completely Uninstall Skype For Business – Skype Community
Posted in Office, Office 2010, Office 2013, Office 2016, Power User | Leave a Comment »