The Wiert Corner – irregular stream of stuff

Jeroen W. Pluimers on .NET, C#, Delphi, databases, and personal interests

  • My badges

  • Twitter Updates

  • My Flickr Stream

  • Pages

  • All categories

  • Enter your email address to subscribe to this blog and receive notifications of new posts by email.

    Join 1,861 other subscribers

Archive for the ‘Hardware Development’ Category

Relay based computers…

Posted by jpluimers on 2019/05/20

Cool hardware: [WayBack] click-click-click-click-click-CHUNK… – Joe C. Hecht – Google+

Sources:

–jeroen

Read the rest of this entry »

Posted in Development, Hardware Development, History | Leave a Comment »

On my reading list: stuff on U-Boot, Device-Tree, etc

Posted by jpluimers on 2019/05/08

For my reading list:

It might be that Mender 1.7 and up support OpenSuSE:

via:

DTB = Device Tree Blob

–jeroen

Posted in Development, Hardware Development, Raspberry Pi, Software Development | Leave a Comment »

Repurposing Old Smartphones for Home Automation | Linux.com | The source for Linux information

Posted by jpluimers on 2019/03/13

Interesting read and watch:

At the recent Embedded Linux Conference and OpenIoT Summit, Mozilla Technical Evangelist Dietrich Ayala proposed a simple and affordable solution to home automation: A discarded smartphone can handle some of the most useful home automation tasks without requiring expensive hubs and sensors — or risking data security in the cloud.

Source: [WayBackRepurposing Old Smartphones for Home Automation | Linux.com | The source for Linux information.

Via Ruurd Pels.

GitHub Repository  autonome/context by autonome (Dietrich Ayala)

–jeroen

Posted in Development, Hardware Development, IoT Internet of Things, Network-and-equipment, Power User, Software Development | Leave a Comment »

Smart idea: powering a stack of Raspberry Pi using 2.1mm barrel connector splitter…

Posted by jpluimers on 2019/02/20

Smart idea by [WayBacktinspin/rupy: Async. HTTP & NoSQL Distr. VHost PaaS at [WayBack687474703a2f2f686f73742e727570792e73652f636c75737465722e6a7067 (480×640):

Apart from one part I found on Amazon, most parts (and more if you want to built it for instance inside a case) can be obtained from [WayBackDC : Adafruit Industries, Unique & fun DIY electronics and kits, see the pictures and links below.

I think [WayBackpower supply options for multiple PIs – Raspberry Pi Forums got inspired by this or vice versa.

Posted in Development, Hardware Development, Raspberry Pi | Leave a Comment »

Insentricity :: Adding Solid-State Storage to an Original IBM PC ::

Posted by jpluimers on 2019/02/19

Can you imagine MS-DOS 6.2 recognising an 8 gigabyte SD card and allowing it to format it with multiple 2 gigabyte partitions?

Keeping old stuff working: [WayBackInsentricity :: Adding Solid-State Storage to an Original IBM PC :: with these nice links:

–jeroen

via: [WayBack] There was a lot of interest in how I added solid-state storage when I was tweeting about it a few weeks ago, now you can see… – Chris Osborn – Google+


Posted in Development, Hardware Development, History | Leave a Comment »

web based tools to simulate electronics

Posted by jpluimers on 2019/02/13

Via seedstudio, I bumped into EasyEDA – Wikipedia. It seems there are a lot of on-line tools that allow you to draw and often simulate electronics.

Time to put them on my list of stuff to play around with:

Circuitlab also has a nice free interactive book: [WayBack] “Ultimate Electronics” Book – CircuitLab A free interactive electronics textbook, “Ultimate Electronics”

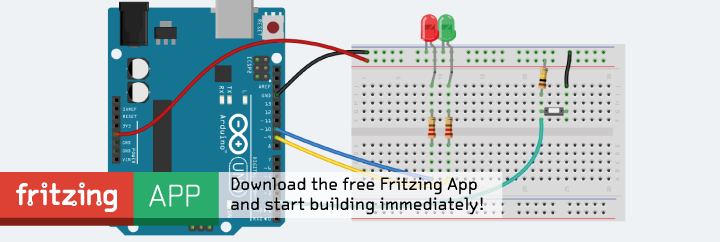
Later – via issue #1 of [WayBack] HackSpace magazine: The new magazine for the modern maker – I also found out about Fritzing which is off-line native software that I want to check out as it is open source:

[Archive.is] Fritzing

It helps a lot knowing there are various Electronic symbol – Wikipedia: Standards for symbols, covering much more than the one below:

To make it easier, power supplies have a host of different symbols for the same things. For instance, DC can have 3 or more different symbols. [WayBack] Electric Current Symbols

–jeroen

Posted in Development, Hardware Development | Leave a Comment »

Build a Power Bank in $2: 7 Steps (with Pictures)

Posted by jpluimers on 2019/02/12

Cool: [WayBackBuild a Power Bank in $2: 7 Steps (with Pictures)

Via:

TL;DR:

  1. salvage 18650 batteries from laptop battery packs
  2. test to separate good ones from bad ones
  3. assemble together the good ones
    1. put them in a holders
    2. solder plusses to plusses and minuses to minuses
  4. add charger electronics
  5. test
  6. put acrylic plate on front/back

Stuff you need:

–jeroen


Posted in 18650, Batteries, Development, Hardware Development, Hardware Interfacing, Li-Ion, Power User | Leave a Comment »

Raspberry Pi and relays – follow up on Having one Raspberry Pi reset another Raspberry Pi through relay or transistor

Posted by jpluimers on 2019/02/12

I did some more research because of Having one Raspberry Pi reset another Raspberry Pi through relay or transistor.

  • [WayBackHow To Add a Reset Switch To Your Raspberry PiRemoving and replacing the USB power cable puts undue wear and tear on your Raspberry Pi, particularly the power port itself. What the system really needs is a reset switch, but sadly none was included.
  • Grove Relay board:
    • has two versions; the V1.2 schematic adds a XC6206P302MR voltage regulator to regulate 3V through the relay coil and an extra 47k Ohm pull-down resistor.
    • has a trigger on high supporting a voltage of 3V, so it works with the Raspberry Pi 3.3V GPIO pins.
    • is “normal open”, so suits the reset scenario (connect on trigger) well.
    • has no “normal closed” header, so if you need that, you’re out of luck
    • does not have optocouplers:
      • Be careful with high voltages on supplies that differ from the one powering your Raspberry Pi
        • It’s fine for resetting another Raspberry Pi powered from the same source
      • The relay is rated 250V ~ but I’d be careful (I’m not sure if this is mains electricity 250V RMS or 250V peak; if the latter, it would be suitable to 175V RMS (approximately 250/1.42 volt).
  • An excellent description (sans optocoupler) on how to connect a relay to power, ground, signal-input and both outputs is at [WayBack/Archive.is] gpio – How to add isolation between raspberry pi and relay board? – Raspberry Pi Stack Exchange (thanks [WayBack] ppumkin).
  • Many 5V optocoupler (or optical-isolator, see video below) based relay boards work fine with the 3.3V GPIO pins from the Raspberry Pi.
    If they don’t, then there are two basic solutions:

    1. Easiest: solder an extra resistor next to the signal input of about the same value (so the voltage drop over it halves), see for instance [WayBack] Controlling a relay board from your RPi · foosel/OctoPrint Wiki
    2. Harder: put an extra transistor in between to pump up the voltage to 5V, see one of the schematics below.

Details of the above can be found from the below links and images from those links.

There is also an Android App with a RaspberryPi distribution that allows you to operate relays:

Finally there are USB relays, shown way down in this post.

Often these are part of some home automation (domotica), IoT, or other, so these are relevant too:

Read the rest of this entry »

Posted in Development, Hardware Development, Raspberry Pi | Leave a Comment »

6502 emulation: the ICE, or in-circuit-emulator…

Posted by jpluimers on 2019/02/05

On my list of hardware things to try:

[WayBack] a different take on 6502 emulation: the ICE, or in-circuit-emulator… – mos6502 – Google+

Basically it consists of three parts:


–jeroen


Posted in 6502, Development, Hardware Development, History, Z80 | Leave a Comment »

Raspberry Pi cannot be woken up by WOL, but it can send, and there is Whack-on-LAN

Posted by jpluimers on 2019/01/17

Cool stuff if you want to make your own WOL devices out of spare parts.

From old to new:

They can be woken up by anything sending magic WOL packets, including Raspberry Pi (which cannot be woken up by them, though you could use a Whack-on-LAN for that).

Basically the Raspberry Pi cannot be woken up with WOL because of a few reasons:

  1. The ethernet chip is connected over USB so it cannot pass the WOL result further on.
  2. If it could, there still is no BIOS to process the WOL result.
  3. When it is halted but has power, the CPU isn’t active. The GPU is, but cannot process the WOL.

It can be a WOL server though: [WayBackRaspberry Pi As Wake on LAN Server: 5 Steps (with Pictures)

–jeroen

Posted in Development, Ethernet, Hardware Development, Network-and-equipment, Power User, Raspberry Pi, Wake-on-LAN (WoL) | Leave a Comment »