


Low cost remote IP KVM and control, is it possible?
Posted by jpluimers on 2021/09/20
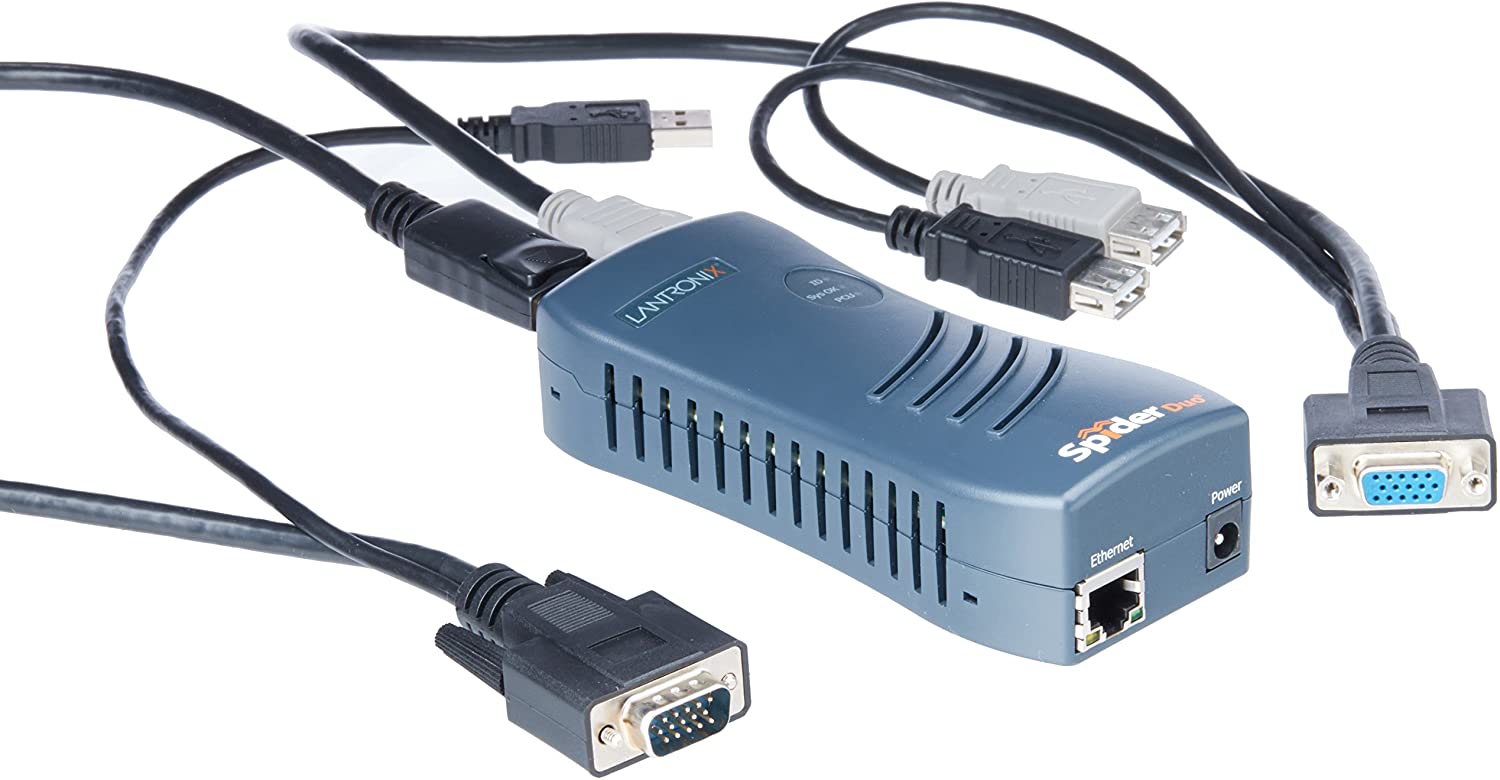
A long time ago, I bought one [Wayback/Archive.is] SpiderDuo Local and Remote KVM Over IP | Lantronix, which – without power control unit – was already some USD 400 (while writing this in fall 2021, the price has increased to almost USD 600 [Archive.is]).
It was about the only “affordable” remote KVM over IPv4 available and by now has a big drawback: it’s based on Java in the browser, which is a pain in the ass to keep working.
So I went looking for alternatives and found only two reasonable ones:
- [Wayback/Archive.is] Pi-KVM – Open and cheap DIY IP-KVM on Raspberry Pi (which runs on Raspberry Pi 2+ and up, though the v2 and v3 boards require Raspberry Pi 4+)
- [Wayback/Archive.is] The Modern, Open-Source KVM over IP | TinyPilot (which requires Raspberry Pi 4+)
- Source code of the non-Pro features: [Wayback/Archive.is] tiny-pilot/tinypilot: Use your Raspberry Pi as a browser-based KVM.
- [Wayback/Archive.is] TinyPilot: Build a KVM Over IP for Under $100 | TinyPilot
- Review: [Archive.is] TinyPilot Provides KVM-over-IP, With Low Cost And Even Lower Latency | Hackaday
I will likely go for the Pi-KVM ; it’s on kickstarter right now
Not only that, but I found a few comparisons favouring PiKVM:
- [Archive.is1/Archive.is2] LDShadowLord comments on KVM over IP – TinyPilot – Who is using this?
- [Archive.is] Looks like the author replied to a similar comment here https://news.ycombinator… & pi-kvm had better performance | Hacker News
I found the Pi-KVM via [Archive.is] Solar Designer on Twitter: “PiKVM v3 HAT, “Raspberry Pi based open-source KVM over IP” by @mdevaev, is now funded on Kickstarter “

At USD 145 or less on kickstarter (excluding a Raspberry Pi 4 or power brick, so add some USD 50 for those), it is way cheaper than the SpiderDuo above which I bought some 5 years ago.
The kickstarter closes in about a week from now, so if you consider one: don’t be late! [Wayback/Archive.is] PiKVM v3 HAT by Maxim Devaev — Kickstarter shows what you get:
- The PiKVM v3 HAT board for Raspberry Pi 4
- USB-C bridge board – to connect the HAT with Pi over USB-C
- ATX controller adapter board and wiring – to connect the HAT to the motherboard (if you want to manage power supply through hardware)
- 2 flat CSI cables
- Screws and brass standoffs
You will also need:
- Raspberry Pi 4 with 2Gb RAM or more
- MicroSD card
- USB-C to USB-A cable
- HDMI cable
- Straight Ethernet cable (for the ATX expansion board connection)
- Power supply unit (5.1V 3A USB-C, recommended by the Raspberry Pi)
You can use our free 3D printing case design to build a beautiful complete unit or wait a bit for the official PiKVM metal case we are working on!

–jeroen


Leave a comment